Materials:
- Felt
- Grape Vine Wreath
- Hot Glue
- Scissors
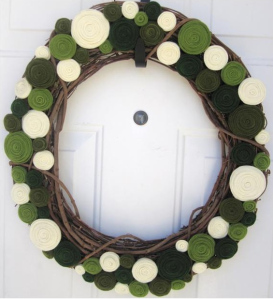
My roommate and I have been ruminating over the necessity of a wreath for our living room. We made one for Christmas but obviously it had to go and now we can’t get over how perfect this spot on our wall is for a wreath. We finally decided on a cute felt rosette wreath I found on Pinterest a while back. When we went to the website it was from it turned out it wasn’t a tutorial but you could buy it on Etsy for $70! We thought not. We looked it up elsewhere and it seemed easy enough so we decided to go through with it. This was our goal:
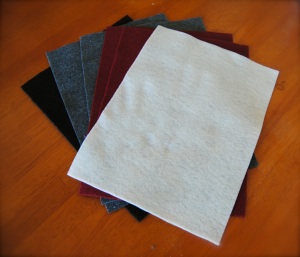
We got everything from Michael’s and it was super cheap (add to that the college student discount we get at our local Michael’s and say it with me: ECONOMICAL). Michael’s has sheets of felts for $.29 and they are the perfect size for this project. Any bigger and it’d be a bit difficult. We decided to go with this color scheme because it was good for all year round and come on…those colors are adorbs.
So basically, you can get one small rosette from a 3×3 square. You can get one medium sized rosette from 6×6 square and one large rosette from a 9×9 square. Biggest thing about this project, though, is nothing needs to be exact (my kind of craft)! To form the rosette, take one of your squares of felt and cut it into a circle. Take the circle and cut it into a spiral. Here’s a template I found from here: http://bit.ly/qycCMK
Roll from the outside in. When it’s all rolled flip it over and hot glue the bottom to keep it sturdy. I happen to like a lot of hot glue, but my roommate maintains that less is adequate. Sigh…I guess it’s your prerogative. Make as many as you want. Really. Do the whole wreath. Do half the wreath. The magic about this is it looks beautiful either way. Here’s how some of your rosettes should come out.
Now, right about now you’re probably thinking this is the best, easiest craft EVER. While that may be true there is one downside. It’s time consuming. It took two of us about an hour to make this amount of rosettes:
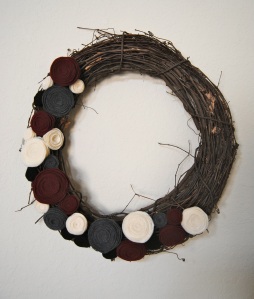
Once you finish the amount of rosettes you want, arrange them on the wreath without fastening them. Again, this is totally up to you! Arrange them how you think they look pretty, there’s really no right or wrong way. Once you have it all set, hot glue them on and BOOM. You’re done. That’s right people, that’s all it takes. Minimal supplies, minimal moola, and MAXIMUM awesomeness. Here’s ours:


This is magnificent! I can’t wait to see what it looks like in person. Make me one. Now. Patronus said so.
I’d be happy to! We can do it together. 🙂